Wednesday 29 April 2009

It was Suz's birthday!

Suz's birthday card & envelope :o)
Ingredients:
Cardstock: SU! Rainbow sherbet; SU! Whisper White c/s; Orange c/s – SU! Bold Brights; Blueish coloured & textured c/s - Bazill
Ink Pads: SU! Taken with Teal; Versamark; Stazon black
Stamp Sets: B’day cake stamp from “Fun and Fast Notes”; Whistle blower from “ Big Bold Birthday”
SU! Large oval punch; SU! Scallop oval punch
At the moment I have only 1 set of SU! markers - some of which I used to colour in the hearts 'flames' of the lit candles, candle itself coloured with the markers. I coloured in the cake and cake board by using the blending pen and an ordinary stamp pad technique.

Monday 27 April 2009

Stampin' Up! May Promotional Offer

Wow - I can't wait until May to be topping up my designer paper collection! Valid from the 1st May until 30th May - Stampin' Up!'s offer is - buy 3 packs of designer paper, get 4th FREE! This is for any selection of paper packs in the current main catalogue, from the retired list [depending on availability] and also from the mini catalogue too! There are no limits as to how many packs you can purchase

Saturday 25 April 2009

Kelsey's birthday card

Just a wee "Happy 10th Birthday" to Kelsey :o) I have absolutely no idea why this image has been rotated round this way by Blogger - it certainly is not of that orientation on my PC files. Ingredients: Ink pads - Pixie Pink & Chocolate Chip ink pads Stamp sets: Birthday sentiment from Cheer & Wishes set; "To you from me" sentiment from Best Yet set; Big Bold Birthday set Cardstock: Pink c/s from SU! bold brights. SU! Whisper white c/s SU! grossgrain ribbon. Tools used: SU! Scallop border punch; Corner notch punch by EK Success [my own]

Wednesday 22 April 2009

Little 'Thank You' notelet

Ingredients:
Stamp sets: Garden Whimsey; Curvy Verses;
Ink Pads: Real Red, Garden Green and Barely Banana
Tools used: Paper trimmer; SU! Stamp-a-ma-jig; SU! Sprial punch
Cardstock: All SU!

Tuesday 21 April 2009

New baby gift tags for nappy cakes

2 little gift tags for a baby girl and baby boy nappy cake commission for a client:
Ingredients:
Stamp set: "Fun and Fast Notes"
Ink pads: Pixie pink and Bashful blue
Tools: SU! scallop border punch; SU! circle punch for 'ticket punched' look
Materials: Textured cardstock all from SU!; Whisper White cardstock from SU!; white grossgrain ribbon from SU!

Thursday 9 April 2009

Book Marks

Ingredients:
Cardstock - all SU!
Stamp set: Baroque Motifs
Ink pads: Pixie Pink; Green Galore; Brilliant Blue; Pumpkin Pie and Versamark
Grossgrain ribbon: all SU!
Tools used: Crosscuts bookmark die
Although I used the above die, it's fairly easy to cut your own bookmark using a papertrimmer, corner rounder. A hole punch for the ribbon to give a lovely finish!

Wedding Card

This card was made using inspiration from this blog. My 16 yr old daughter is accompanying her BF to his sister's wedding on Saturday and I thought I would make this for my daughter to give the bride and groom.
Ingredients:
All cardstock from SU!
Stamp sets: Butterfly from Garden Whimsey set; Pocket Silhouettes
Ink pad: Perfect Plum
Tools: Sizzix Scallop Oval Frame; Ellison Thick Cuts Daisies; SU! Dimensionals; Pearlised gemstone [my own]

Library Card and Pocket

RECIPE:
Patterned paper from SU! “Sweet Always” 12x12 pack.
Orange c/s from SU! Bold Brights Ink pads: Chocolate Chip; Pumpkin Pie; Old Olive; Versamark
Stamps: “Friend” from ‘A Little Bit of Happiness’ set; Pocket Silhouettes; “from the heart” sentiment from Seasonal Wishes
Tools: Scallop border punch; 1⅜” punch; Stamp-a-ma-jig [desirable]; paper trimmer; adhesive; scoring tool[s]
On the actual card with 'friend' sentiment, I used the "selective stamping" technique as described here.

Wednesday 8 April 2009

Selective Stamping tutorial

Ever wondered how to omit a particular part from your stamp for your desired effect?
Mask off the area of the stamp with sellotape or masking tape - needs to be medium tack to be effective. Ink the stamp as usual, carefully remove the sellotape/masking tape making sure your hands won't slip or ink transfer will mark your design and proceed to stamp your image.
If you need to use your Stamp-a-ma-jig for positioning purposes, ink your stamp as normal - including whole image of the stamp on to the Stamp-a-ma-jig plastic sheet. Clean and dry stamp as per normal routine and follow the 'masking' instructions above.

Thursday 2 April 2009

Easter bag-a-lopes

A few items I made for my 2 younger kids' teachers [my son currently has 2 due to job share].
Oval All card Ingredients:
Whisper white cardstock trimmed to 6x3" then scored and folded; Old Olive grossgrain ribbon; scallop oval punch; large oval punch; - from new mini catalogue
Inks used: Real Red; Pumpkin Pie; More Mustard
Garden Whimsey Bag-a-lope Ingredients:
Inks used: Garden Green; Pumpkin Pie; Real Red; More Mustard; Black Stazon
Manilla DL envelope [my own]; Whisper White cardstock
Easter Wishes stamp from the "Seasonal Wishes" collection
Corner rounder
Large scallop oval punch - Woodware [my own]

Bag-a-lope Tutorial

A "Bag-a-lope" is basically making your own handcrafted block-base bag from an envelope! Block base bags are the type you get in department stores or even Kraft bags for making paper-bag albums and are available in a variety of sizes!
I've seen quite a few instructions for bag-a-lopes but not seen one for the DL size [standard letter envelope]. A lot of the instructions indicated making a very fine trim at 1 narrow side of the envelope to make the opening. I have actually trimmed off 5½ to 6 cm off at that point to make the bag-a-lope smaller in height.
This bag-a-lope tutorial will have a finished product measuring around 10½ cm high, almost 6cm wide and 5cm wide at deepest part of bagalope. I have found that using Asda/Walmart own brand white envelopes have a weakness with the perforation idea [for when opening the sealed envelope] whilst trying to create this bag-a-lope. I would suggest going for any similar sized and/or colour DL envelope with no perforations and no window.
This is my adaptation:
Follow instructions as per these images until separate instructions are indicated.

Ensure the flap has been sealed and secure in position:

Fig 3. Score 1" from the edge on 2 x longest edges and 1x short edge. At this point you can trim off the suggested 5½ cm from the remaining short edge.

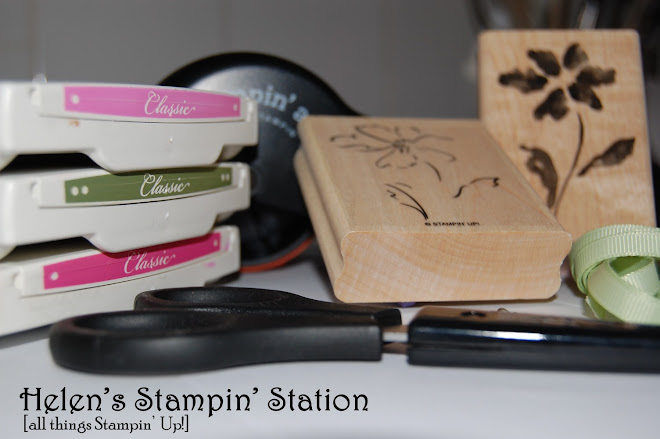
Should you wish to embellish or make your own background using stamps, this is the ideal time to do it prior to folding into shape.

Fig. 3

Once the scores have been made, make firm creases by folding back and forth at scored areas of envelope. This will make it easier to manipulate into the bag-a-lope shape. Open up the adapted envelope so that it resembles a box shape.

All going well, the closed end of the envelope should look something like this:

Add some adhesive to each corner flap as shown here:

Once the adhesive is in place, press both corner flaps firmly to the envelope this will now be the base [double sided tape can be used] and should now look like this:

Now 'pinch' the sides as per this image to bring the bag into shape:

To give more detail to the bag, crop the corners at the open end of the bag with your corner rounder [optional]:

I made a 1cm fold at the top of the bag-a-lope like this:

Many gifts bought from stores have transparent circular seals on them. These may be available in craft sections of shops, however, I have found the repositional ones to be totally *pants* at staying in position or secure!

To make my own seal, I used the remaining 5½ cm part of the envelope I had trimmed to create the opening of the bag-a-lope. I placed a few strips of double-sided tape on this scrap piece as shown in image. I then positioned my 1" circle punch over where the DS tape was and proceeded to punch a circle. Fill up your bag-a-lope, fold over top edge. Remove backing strips from the newly made seal, position and press down to secure.

Mini gift bag or bag-a-lope idea: